


Machine Learning has come to .Net. ML.NET is a library to create custom ML models using C# or F#. Can also be extended to other libraries and frameworks like Infer.NET, TensorFlow, and ONNX for more ML scenarios. In this tutorial we are going to build a model to detect sentiment in phrases using ML.NET and the Sentiment140 dataset for training.
Prerequisites
- Visual Studio 2017 or later
- The ML.NET Model Builder extension for Visual Studio
- The Sentiment140 Dataset. I have used a condensed version to minimize training time. The mini dataset is uploaded on my Github, You will find the link at the end of this tutorial. Feel free to download the whole dataset for proper training.
Create the Project
Download and install the ML.NET Model Builder tool from the Visual Studio Marketplace. You can use the link above. Close all VS instances to complete the installation.
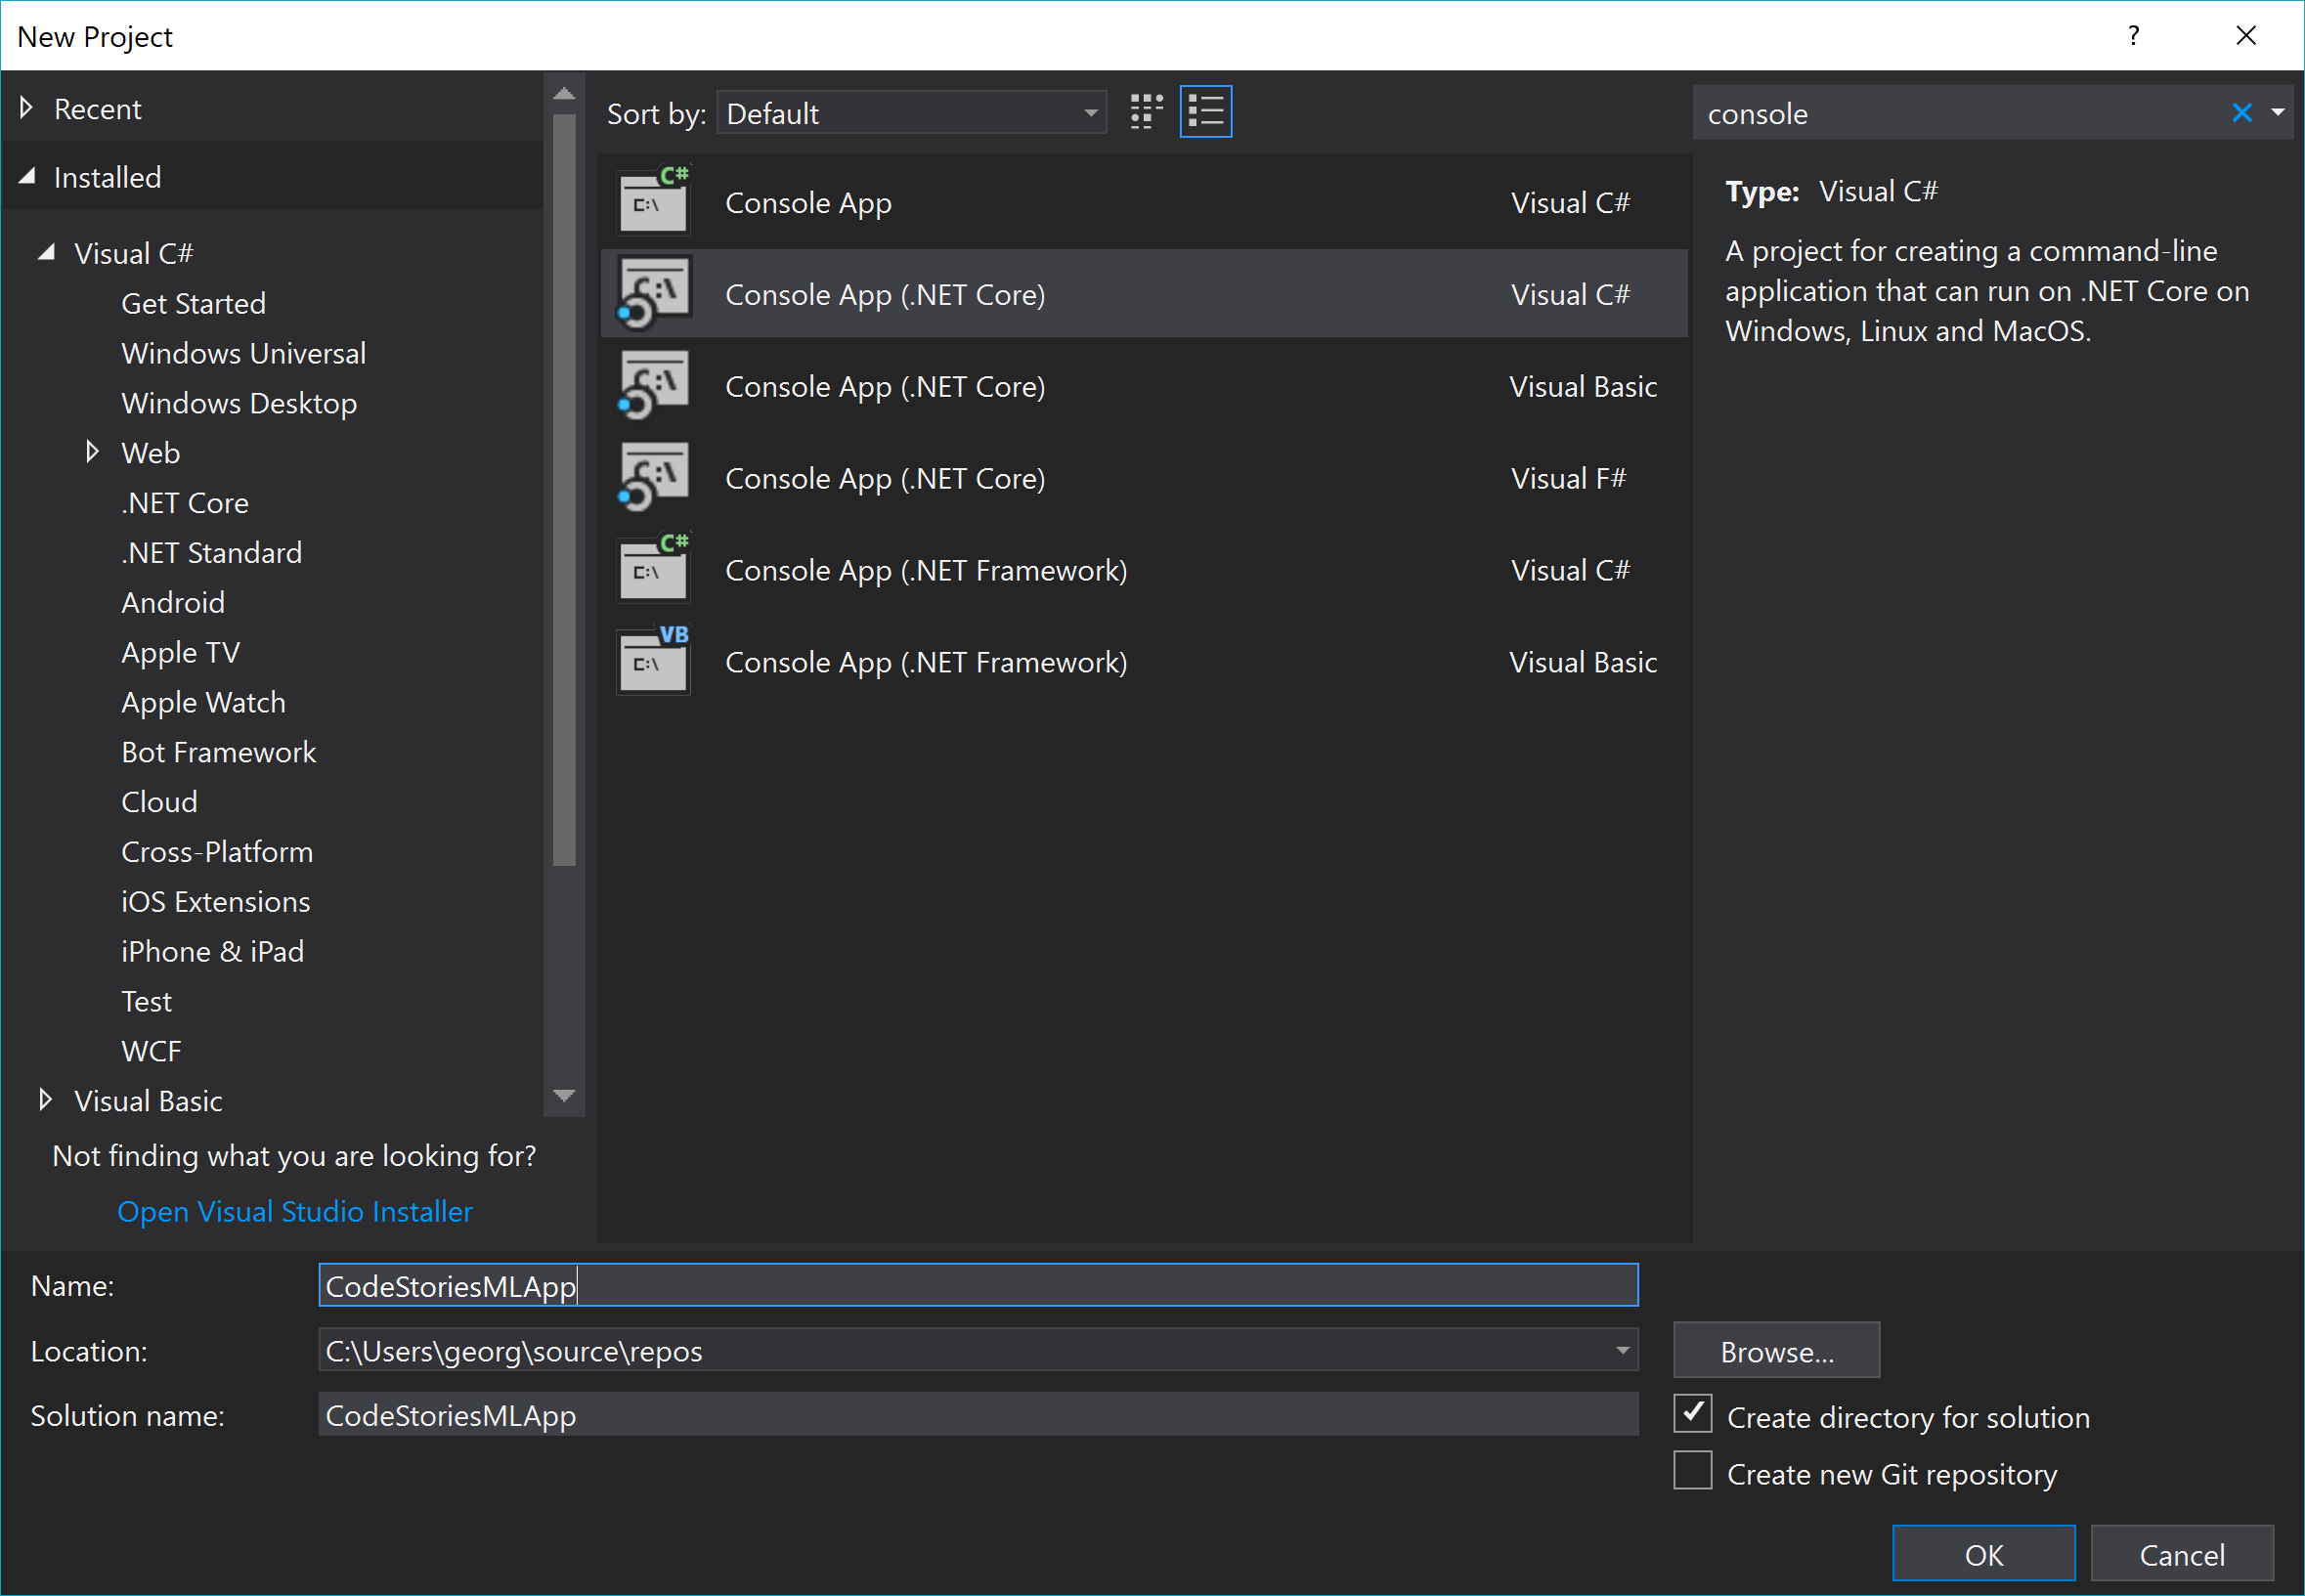
As soon as the installation has completed open Visual Studio and create a new .NET Core console app.
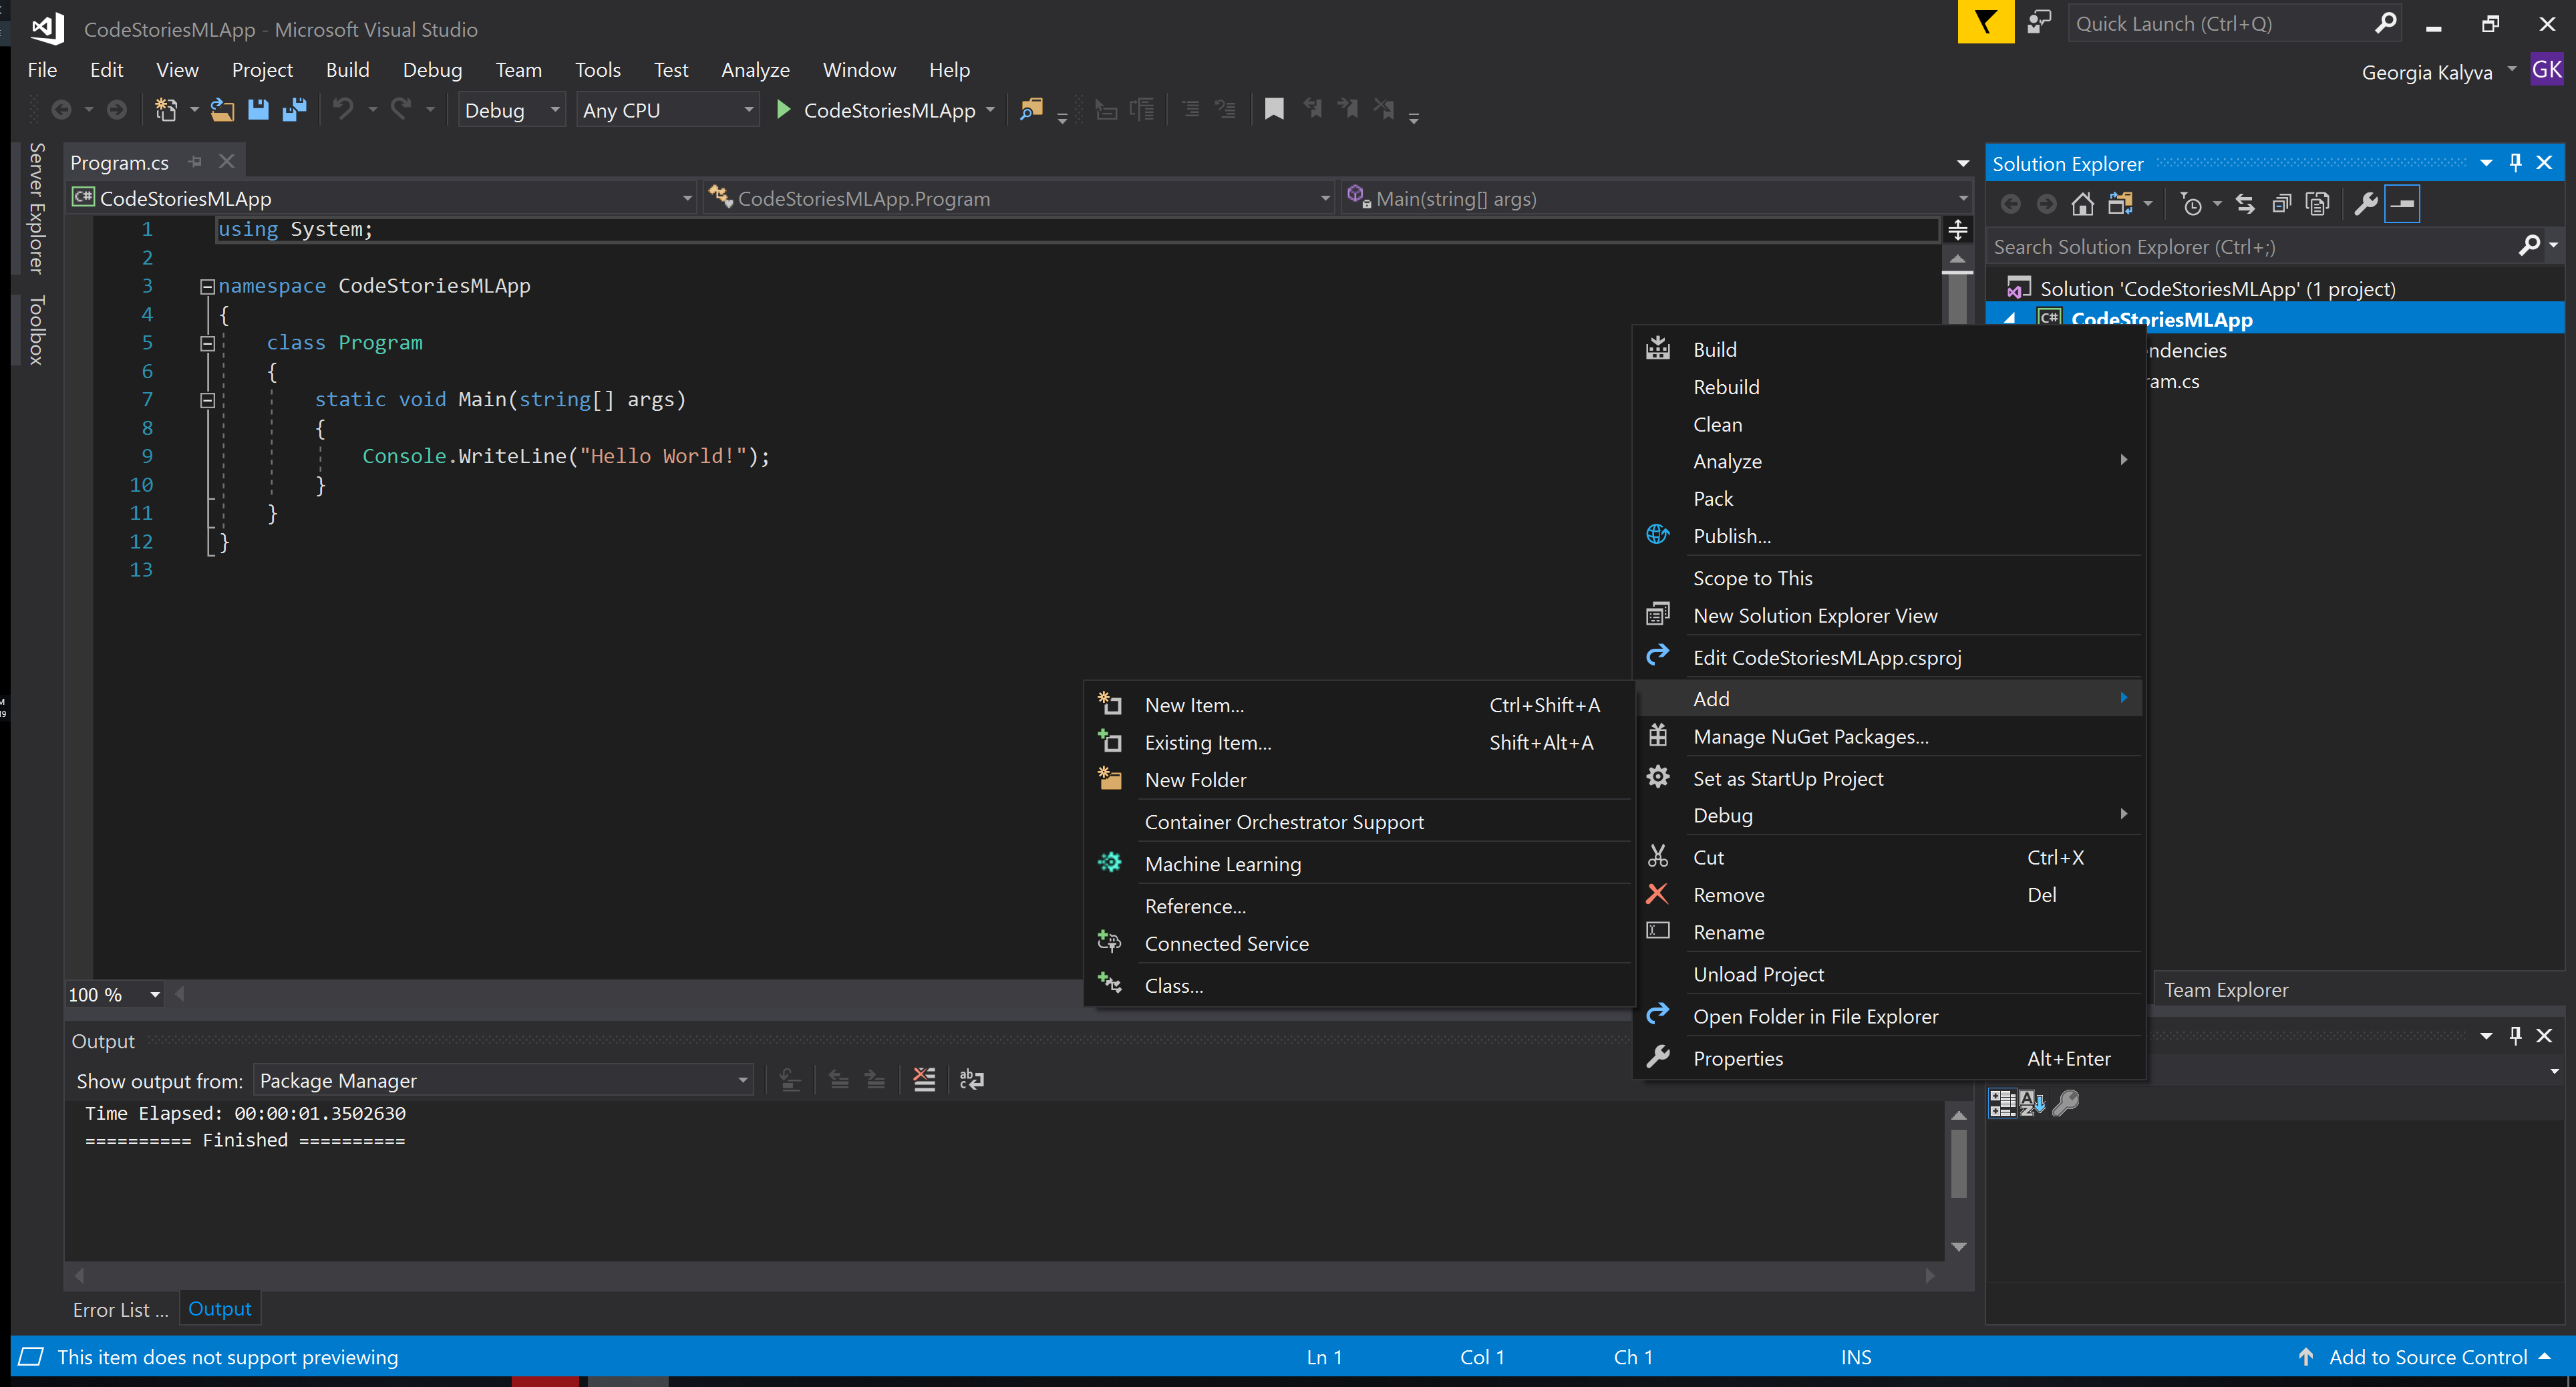
Right-click on the project in Solution Explorer and select Add > Machine Learning. This opens the ML.NET Model Builder in a new window in Visual Studio. Model Builder will help us through the process of building a machine learning model.
Building your model
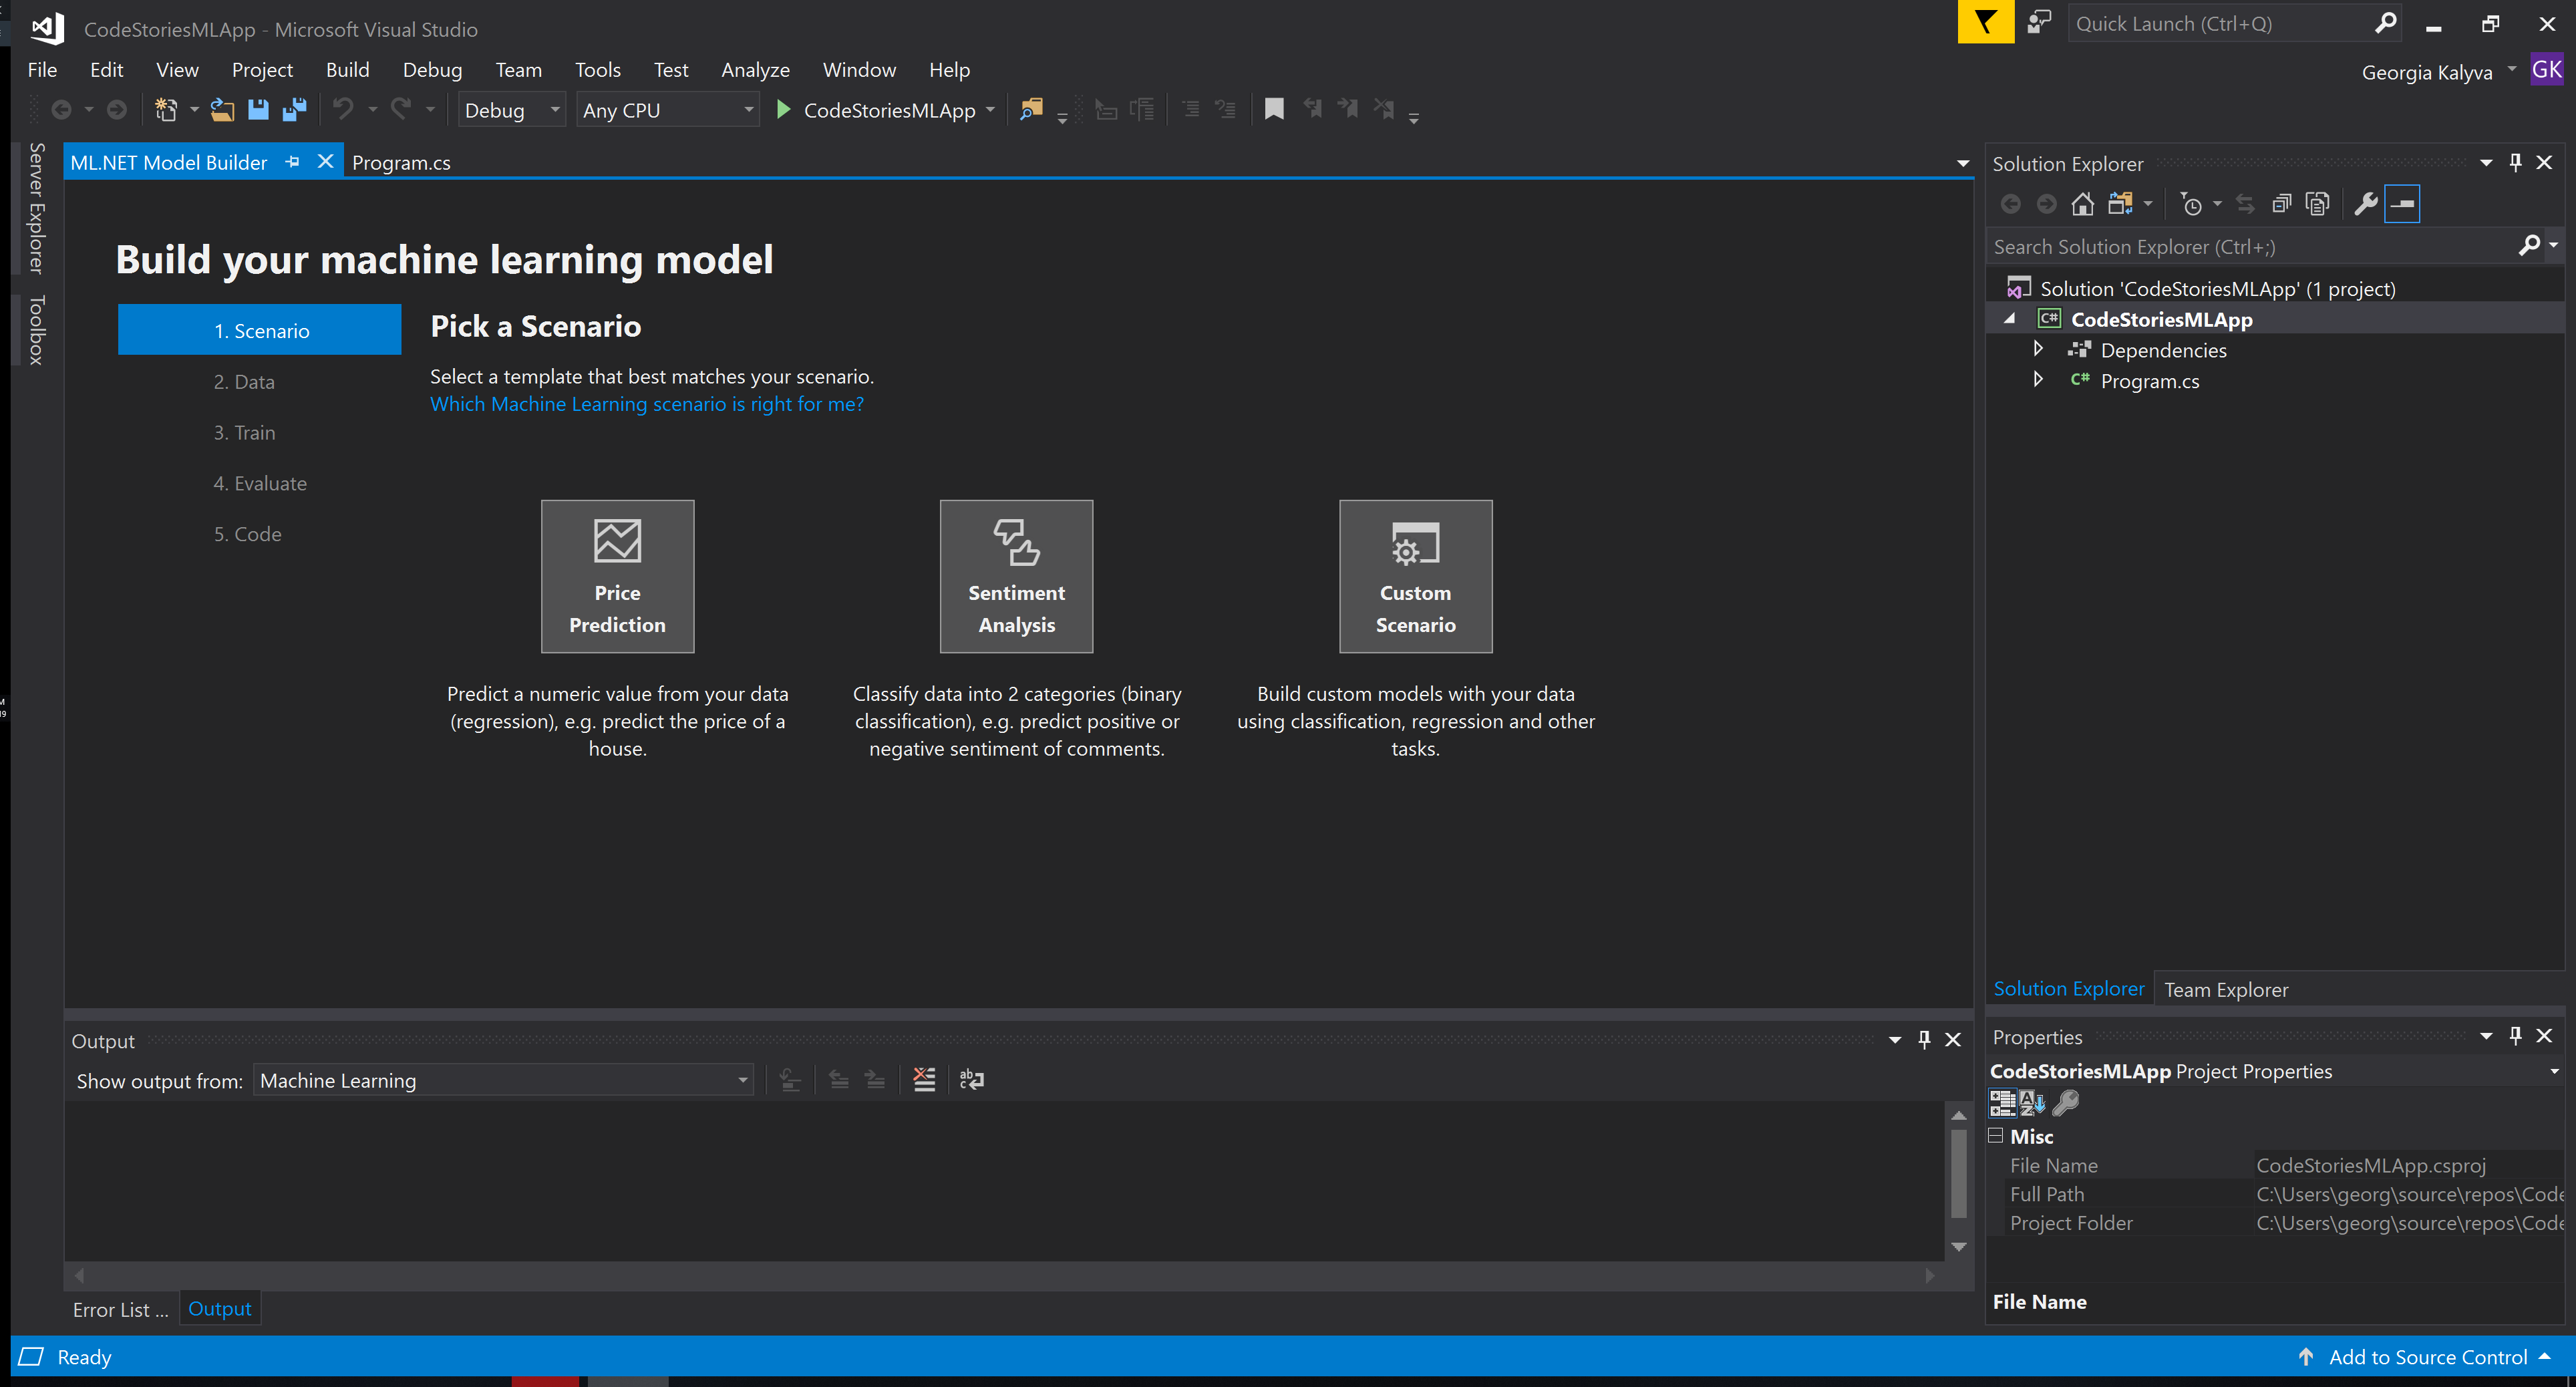
To generate your model, you need to select a machine learning scenario. Model Builder offers several templates. Now we are going to select the Sentiment Analysis scenario.
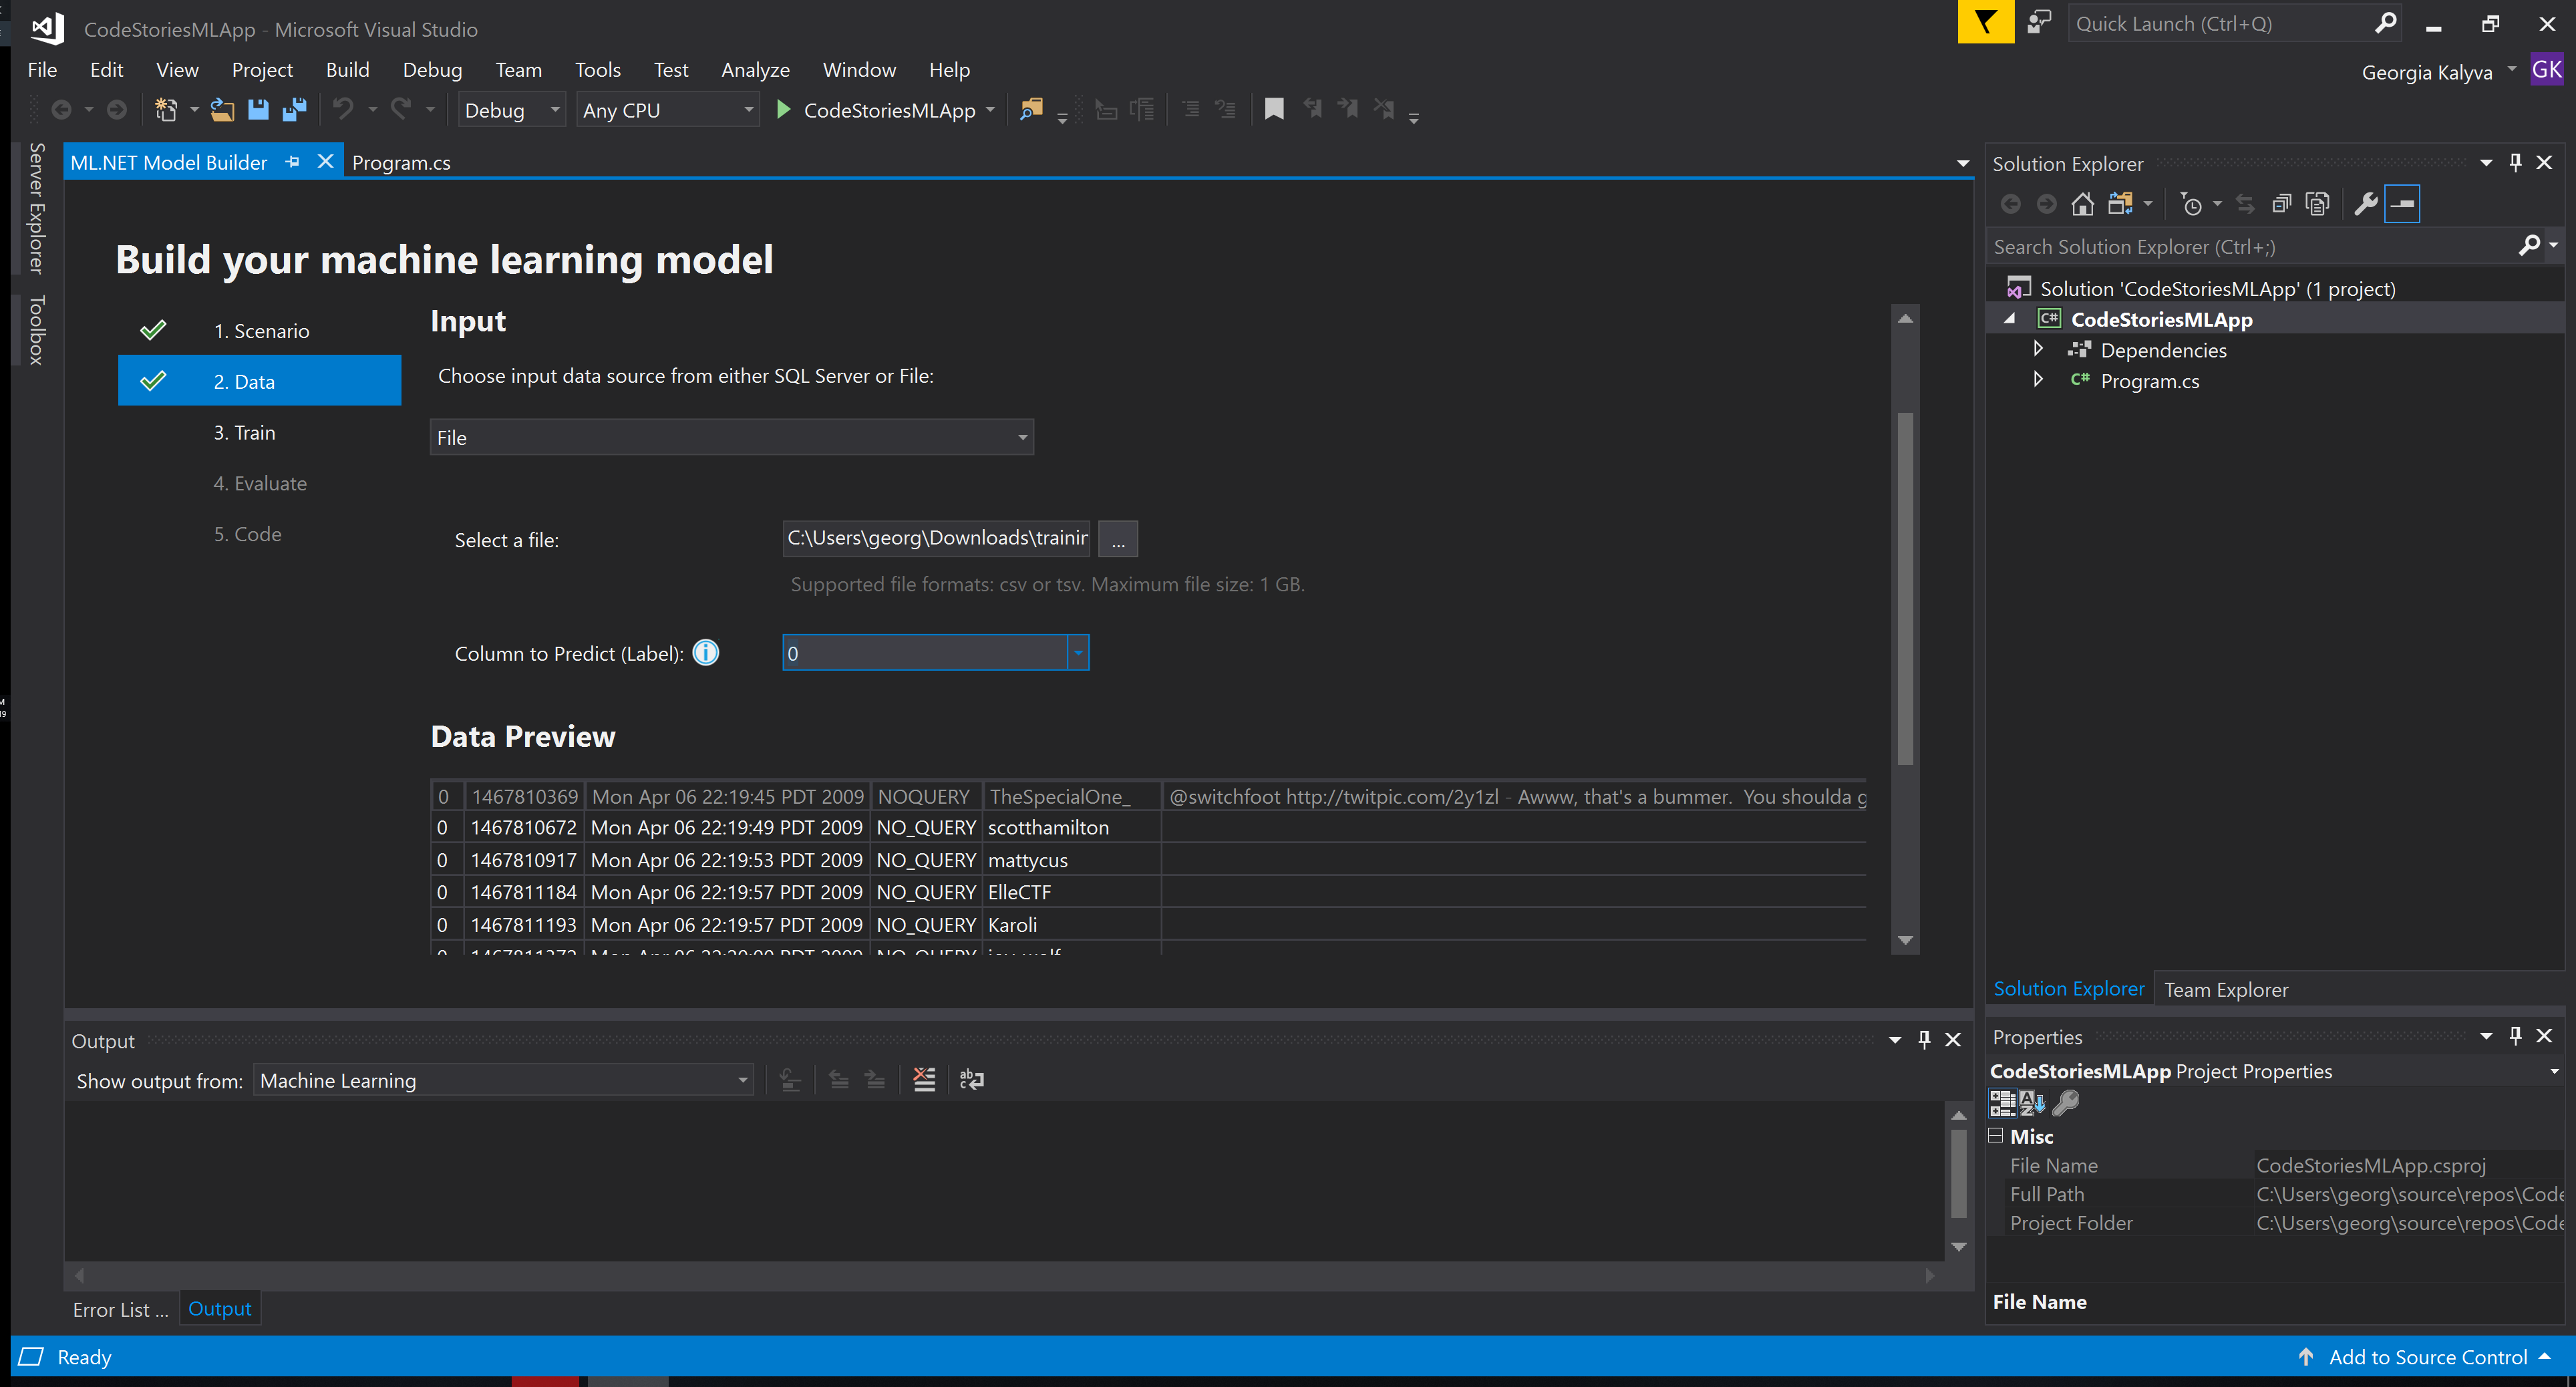
In Model Builder, you can add data from a local file or connect to a SQL Server database. In this case, you will add the dataset file you downloaded in the Prerequisites step.
Select File as the input data source in the drop-down, and in Select a file find and select the dataset file. In my case is the mini dataset I created from the Sentiment140 dataset.
Under Column to predict (Label), select “0”. Since the Dataset has no headers it takes the first row. You can add headers to avoid misunderstandings. The Label is what you are predicting, which in this case is the Sentiment found in the first column of the dataset. The rest of the columns are Features, which are attributes that help predict the Label.
If you are using the mini dataset 0 is for negative 1 is for positive. If you are using the original dataset 0 is negative 2 is neutral and 4 is positive, so make a note of this.
Train your Model
After adding your data, go to the Train step. Model Builder evaluates many models with varying settings to give you the best performing model.
The default Time to train (the amount of time you would like Model Builder to explore various models) is 10 seconds. Note that for larger datasets, you should set a longer training time. If you add very short duration you will get a pop up with the recommended times. Using random or very short durations can cause training to fail.
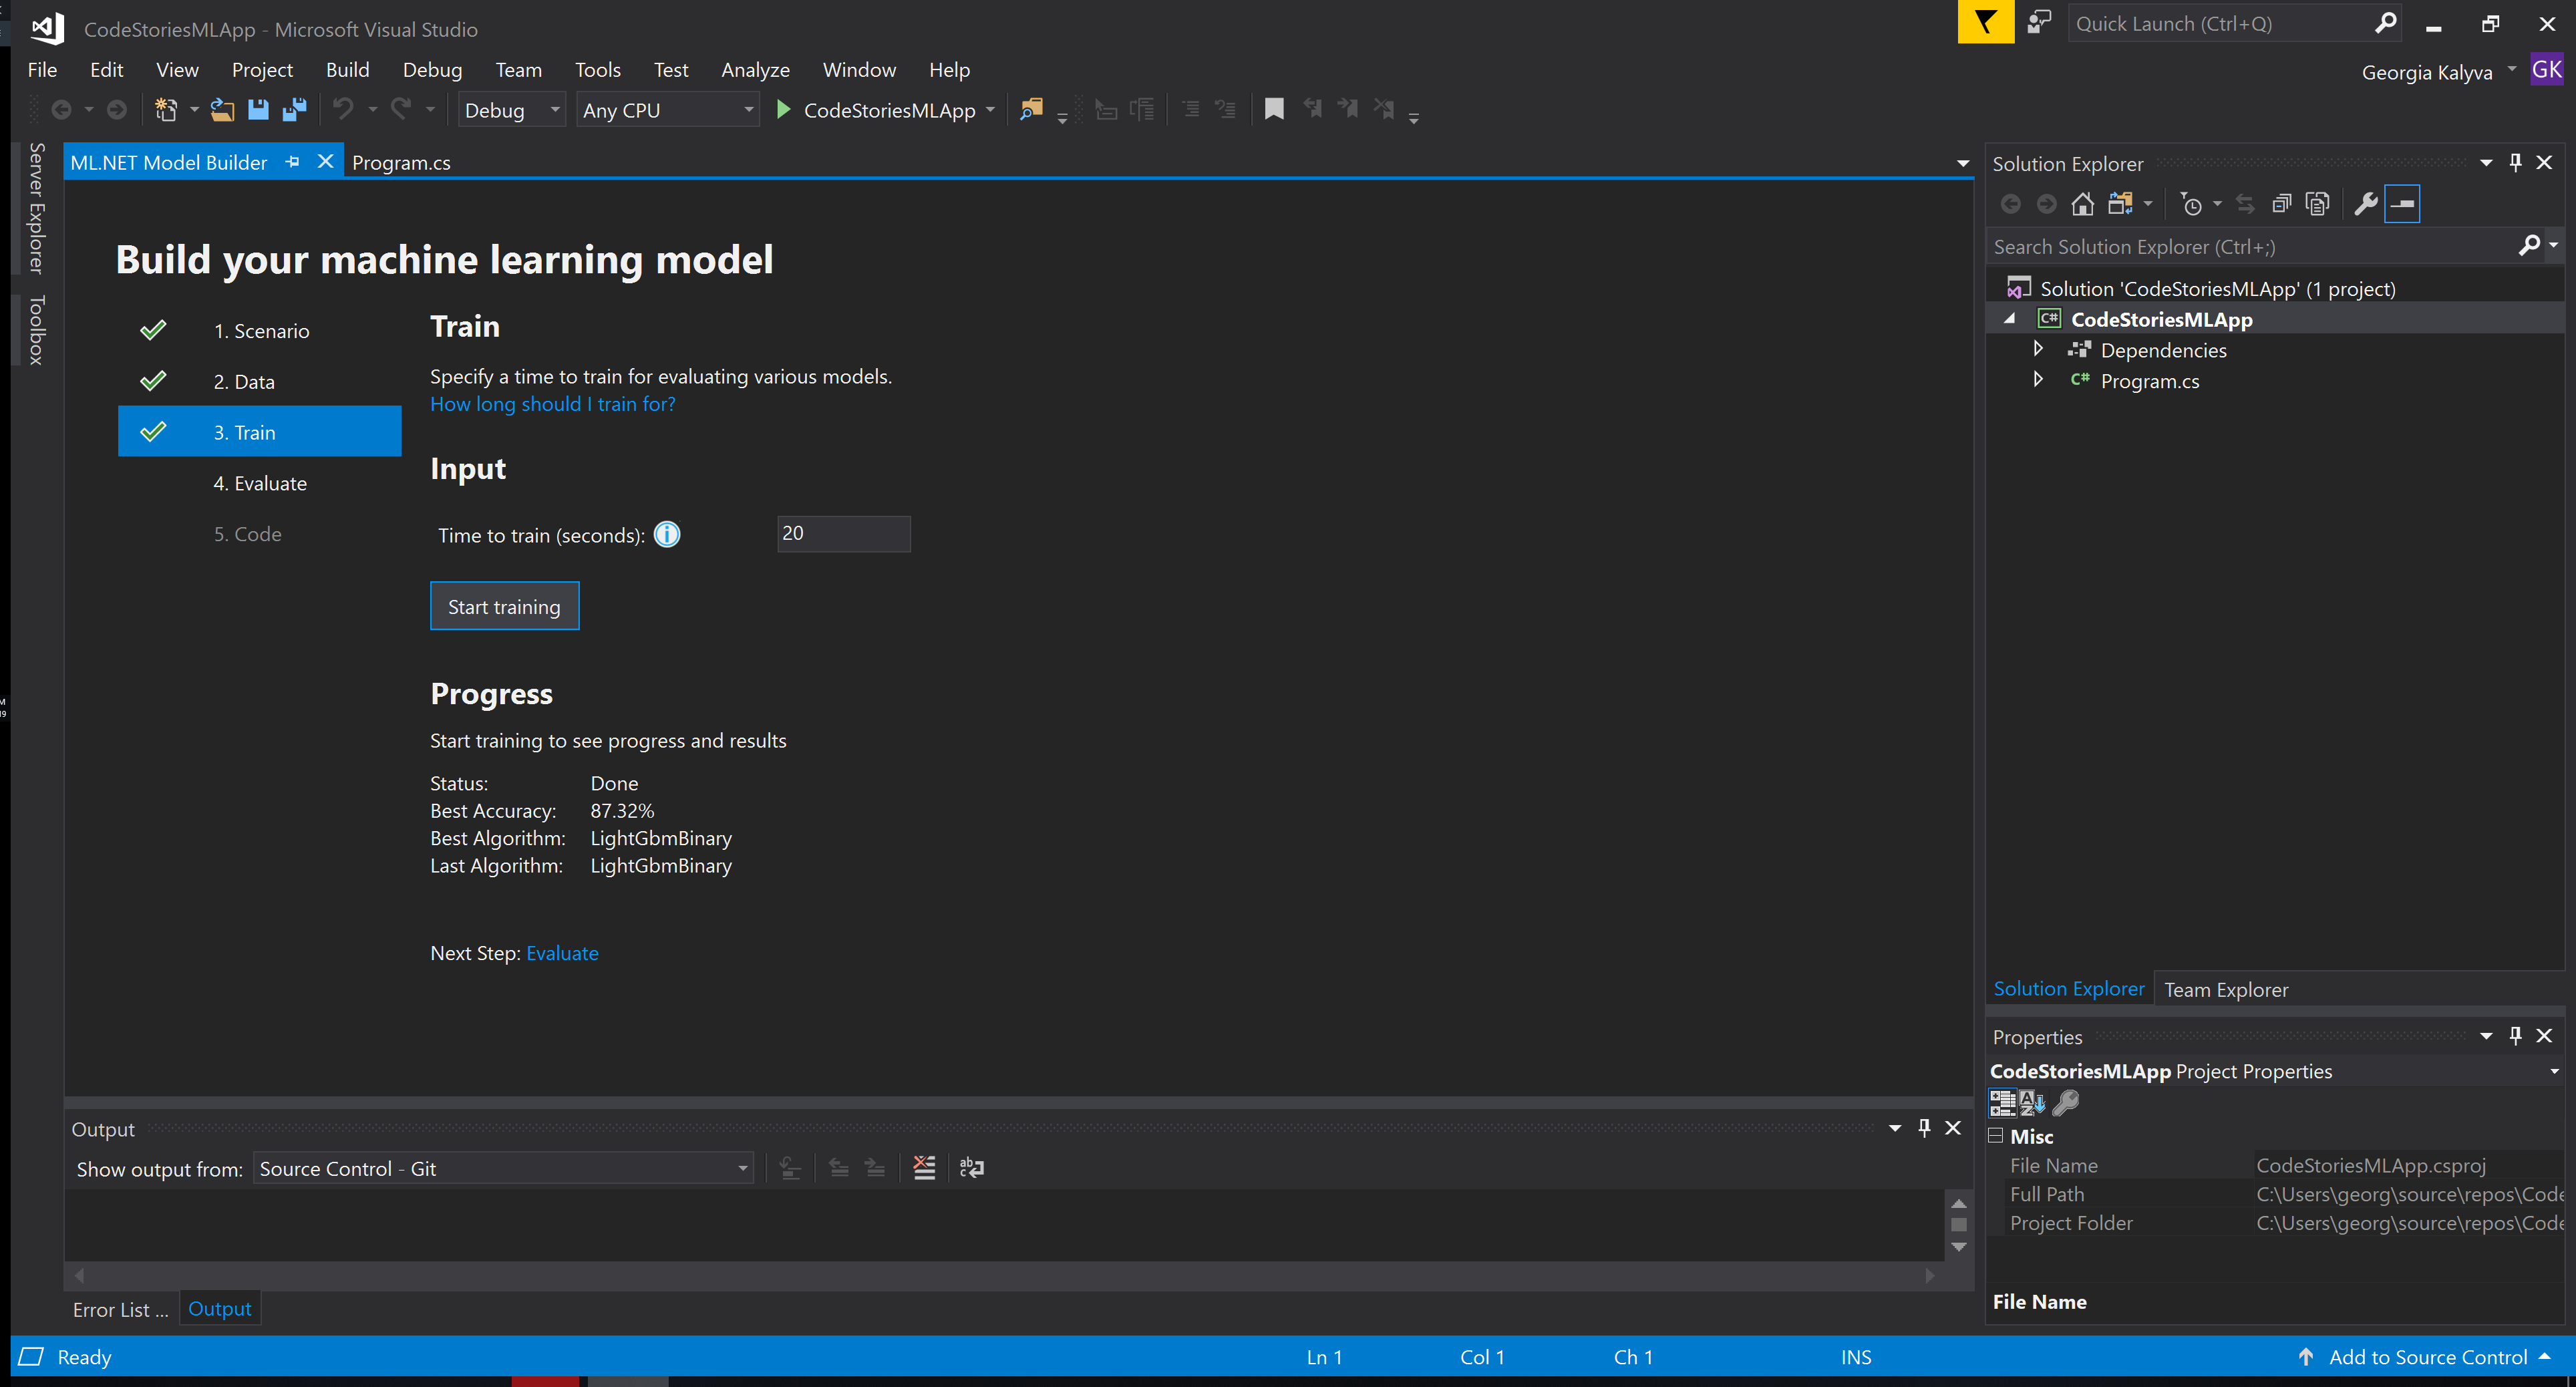
Select Start Training to start the training process.
You can keep track of the progress of model training in the Progress section.
- Status – This shows you the status of the model training process; this will tell you how much time is left in the training process and will also tell you when the training process has completed.
- Best accuracy – This shows you the accuracy of the best model that Model Builder has found so far. Higher accuracy means the model predicted more correctly on test data.
- Best algorithm – This shows you which algorithm performed the best so far during Model Builder’s exploration.
- Last algorithm – This shows you the last algorithm that was explored by Model Builder.
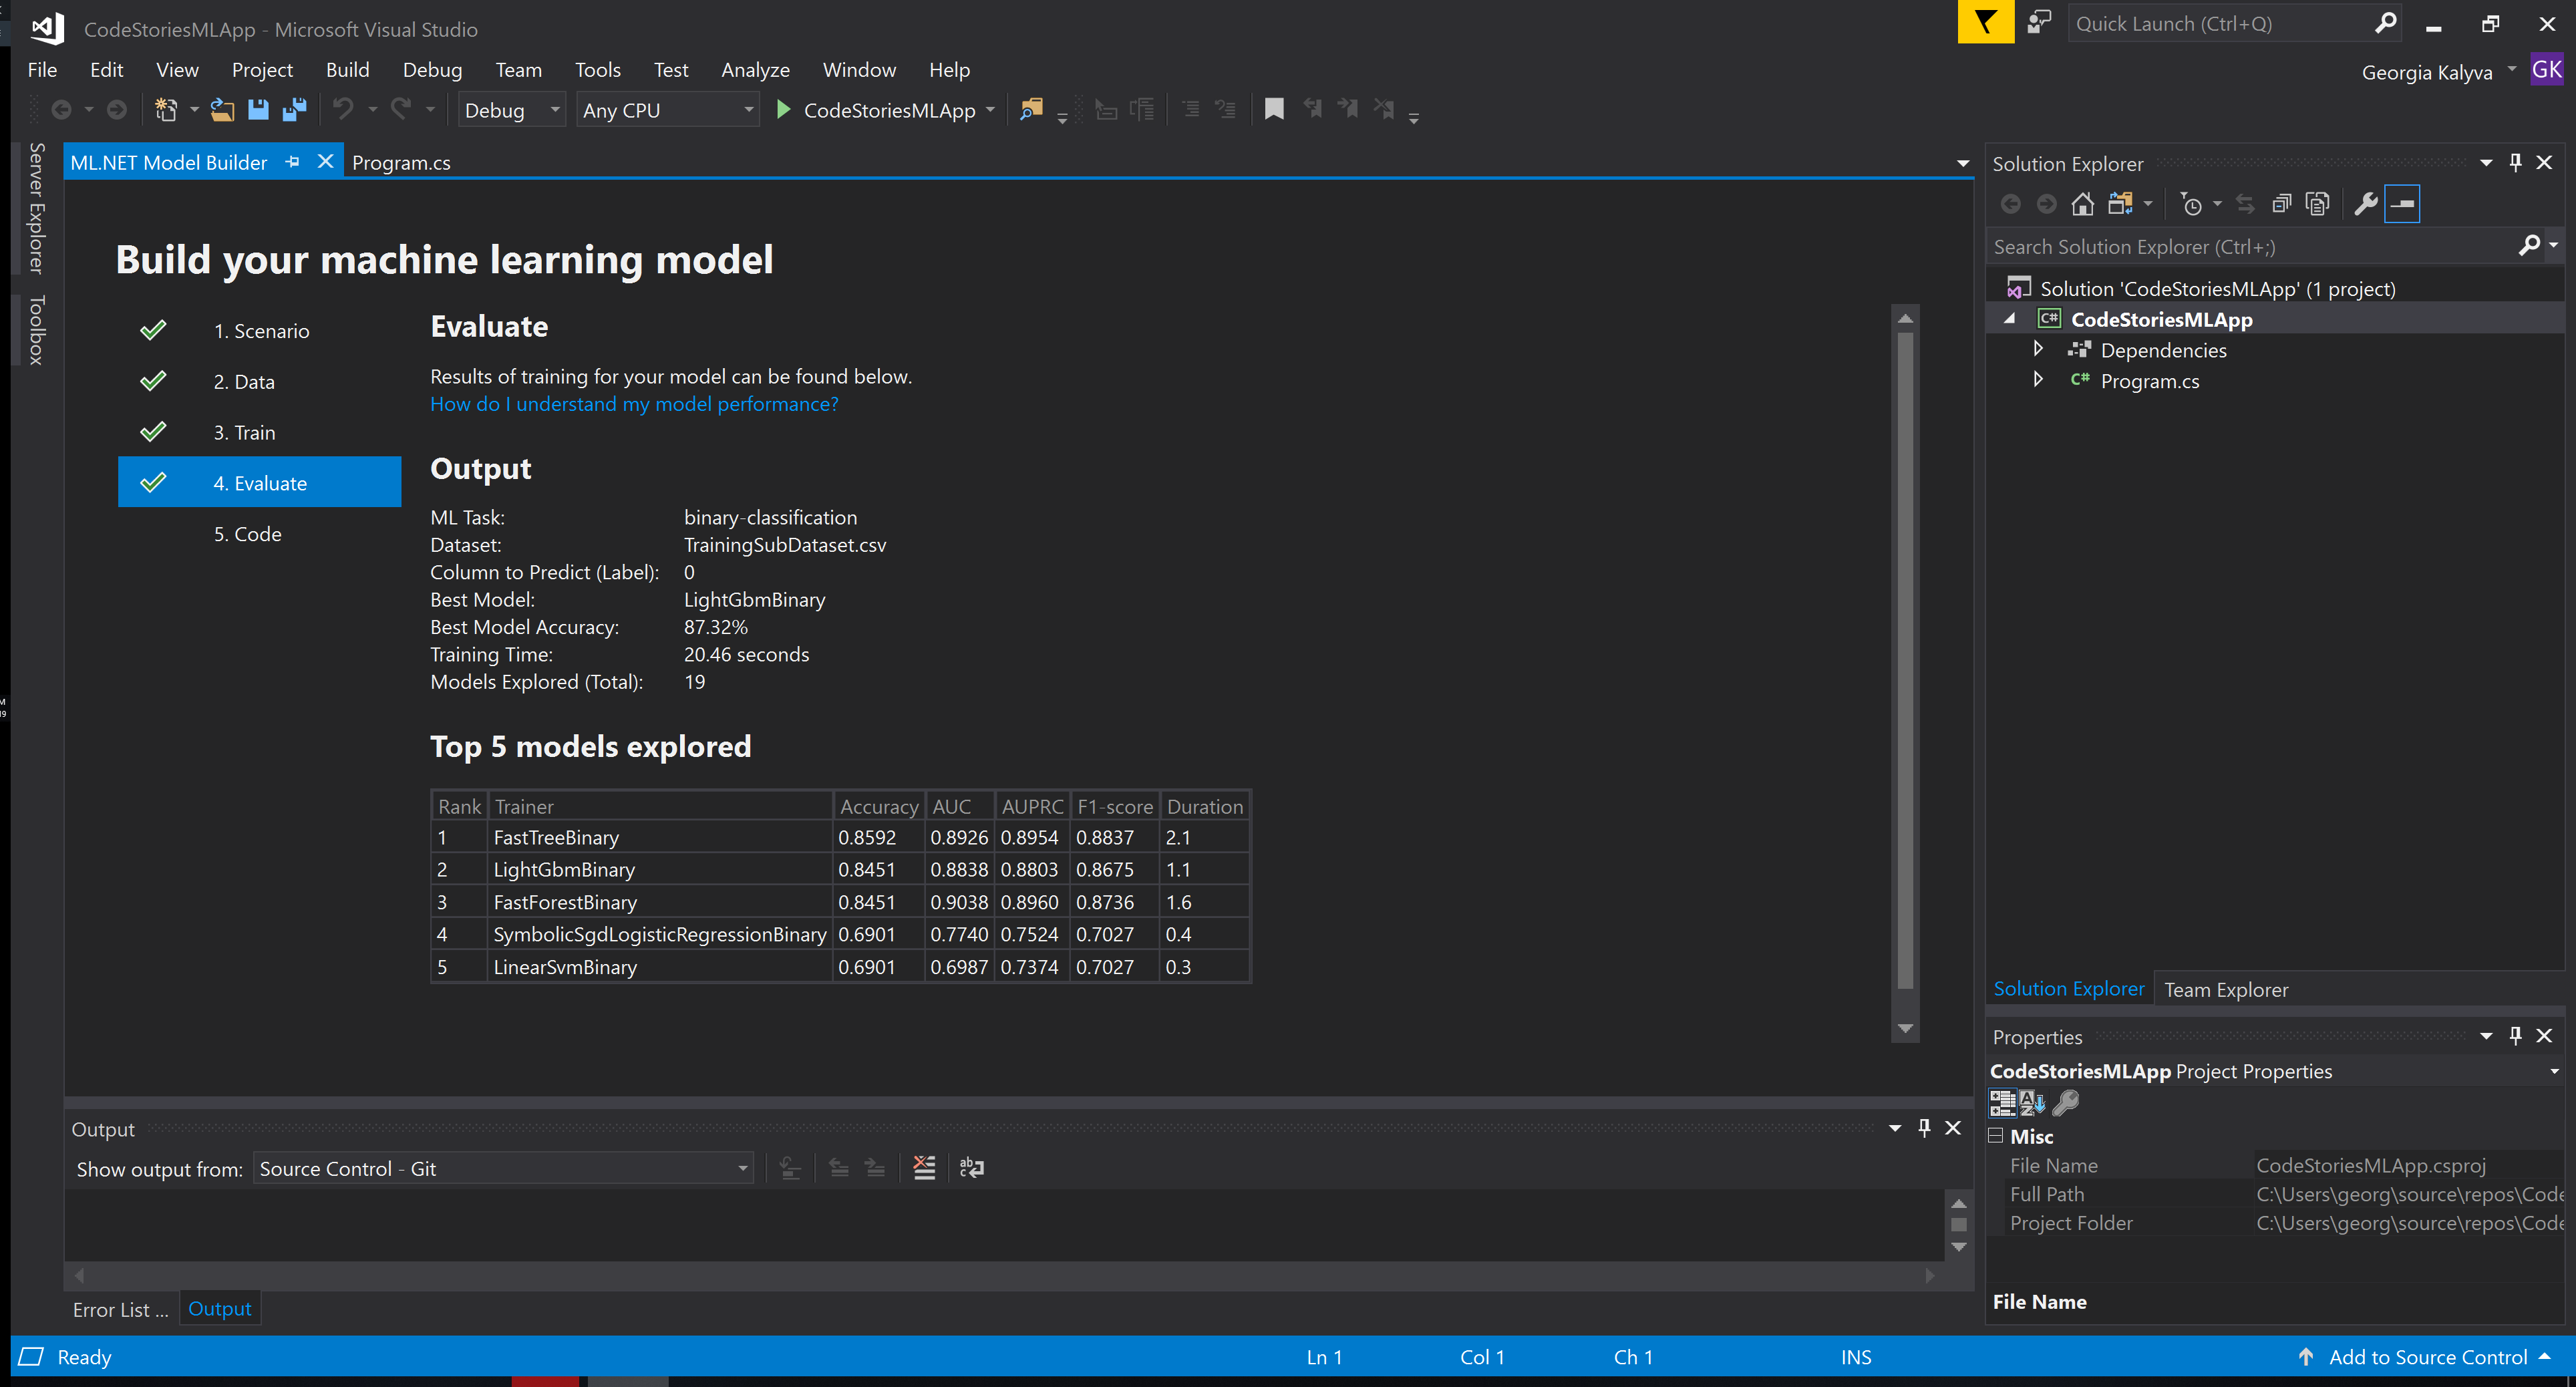
After model training finishes, go to the Evaluate step. The Evaluate step shows you various outputs, including how many models were explored and the ML task (in this case binary classification). Model Builder also displays the top 5 models explored and displays several evaluation metrics for each of those top 5 models, including AUC, AUPRC, and F1-score. You can find more informatio on what those are here.
Run the project
After evaluating your model, move on to the Code step. In the Code step in Model Builder, select Add Projects.
Model Builder adds both the machine learning model and the projects for training and consuming the model to your solution. In the Solution Explorer, you should see the code files that were generated by Model Builder.
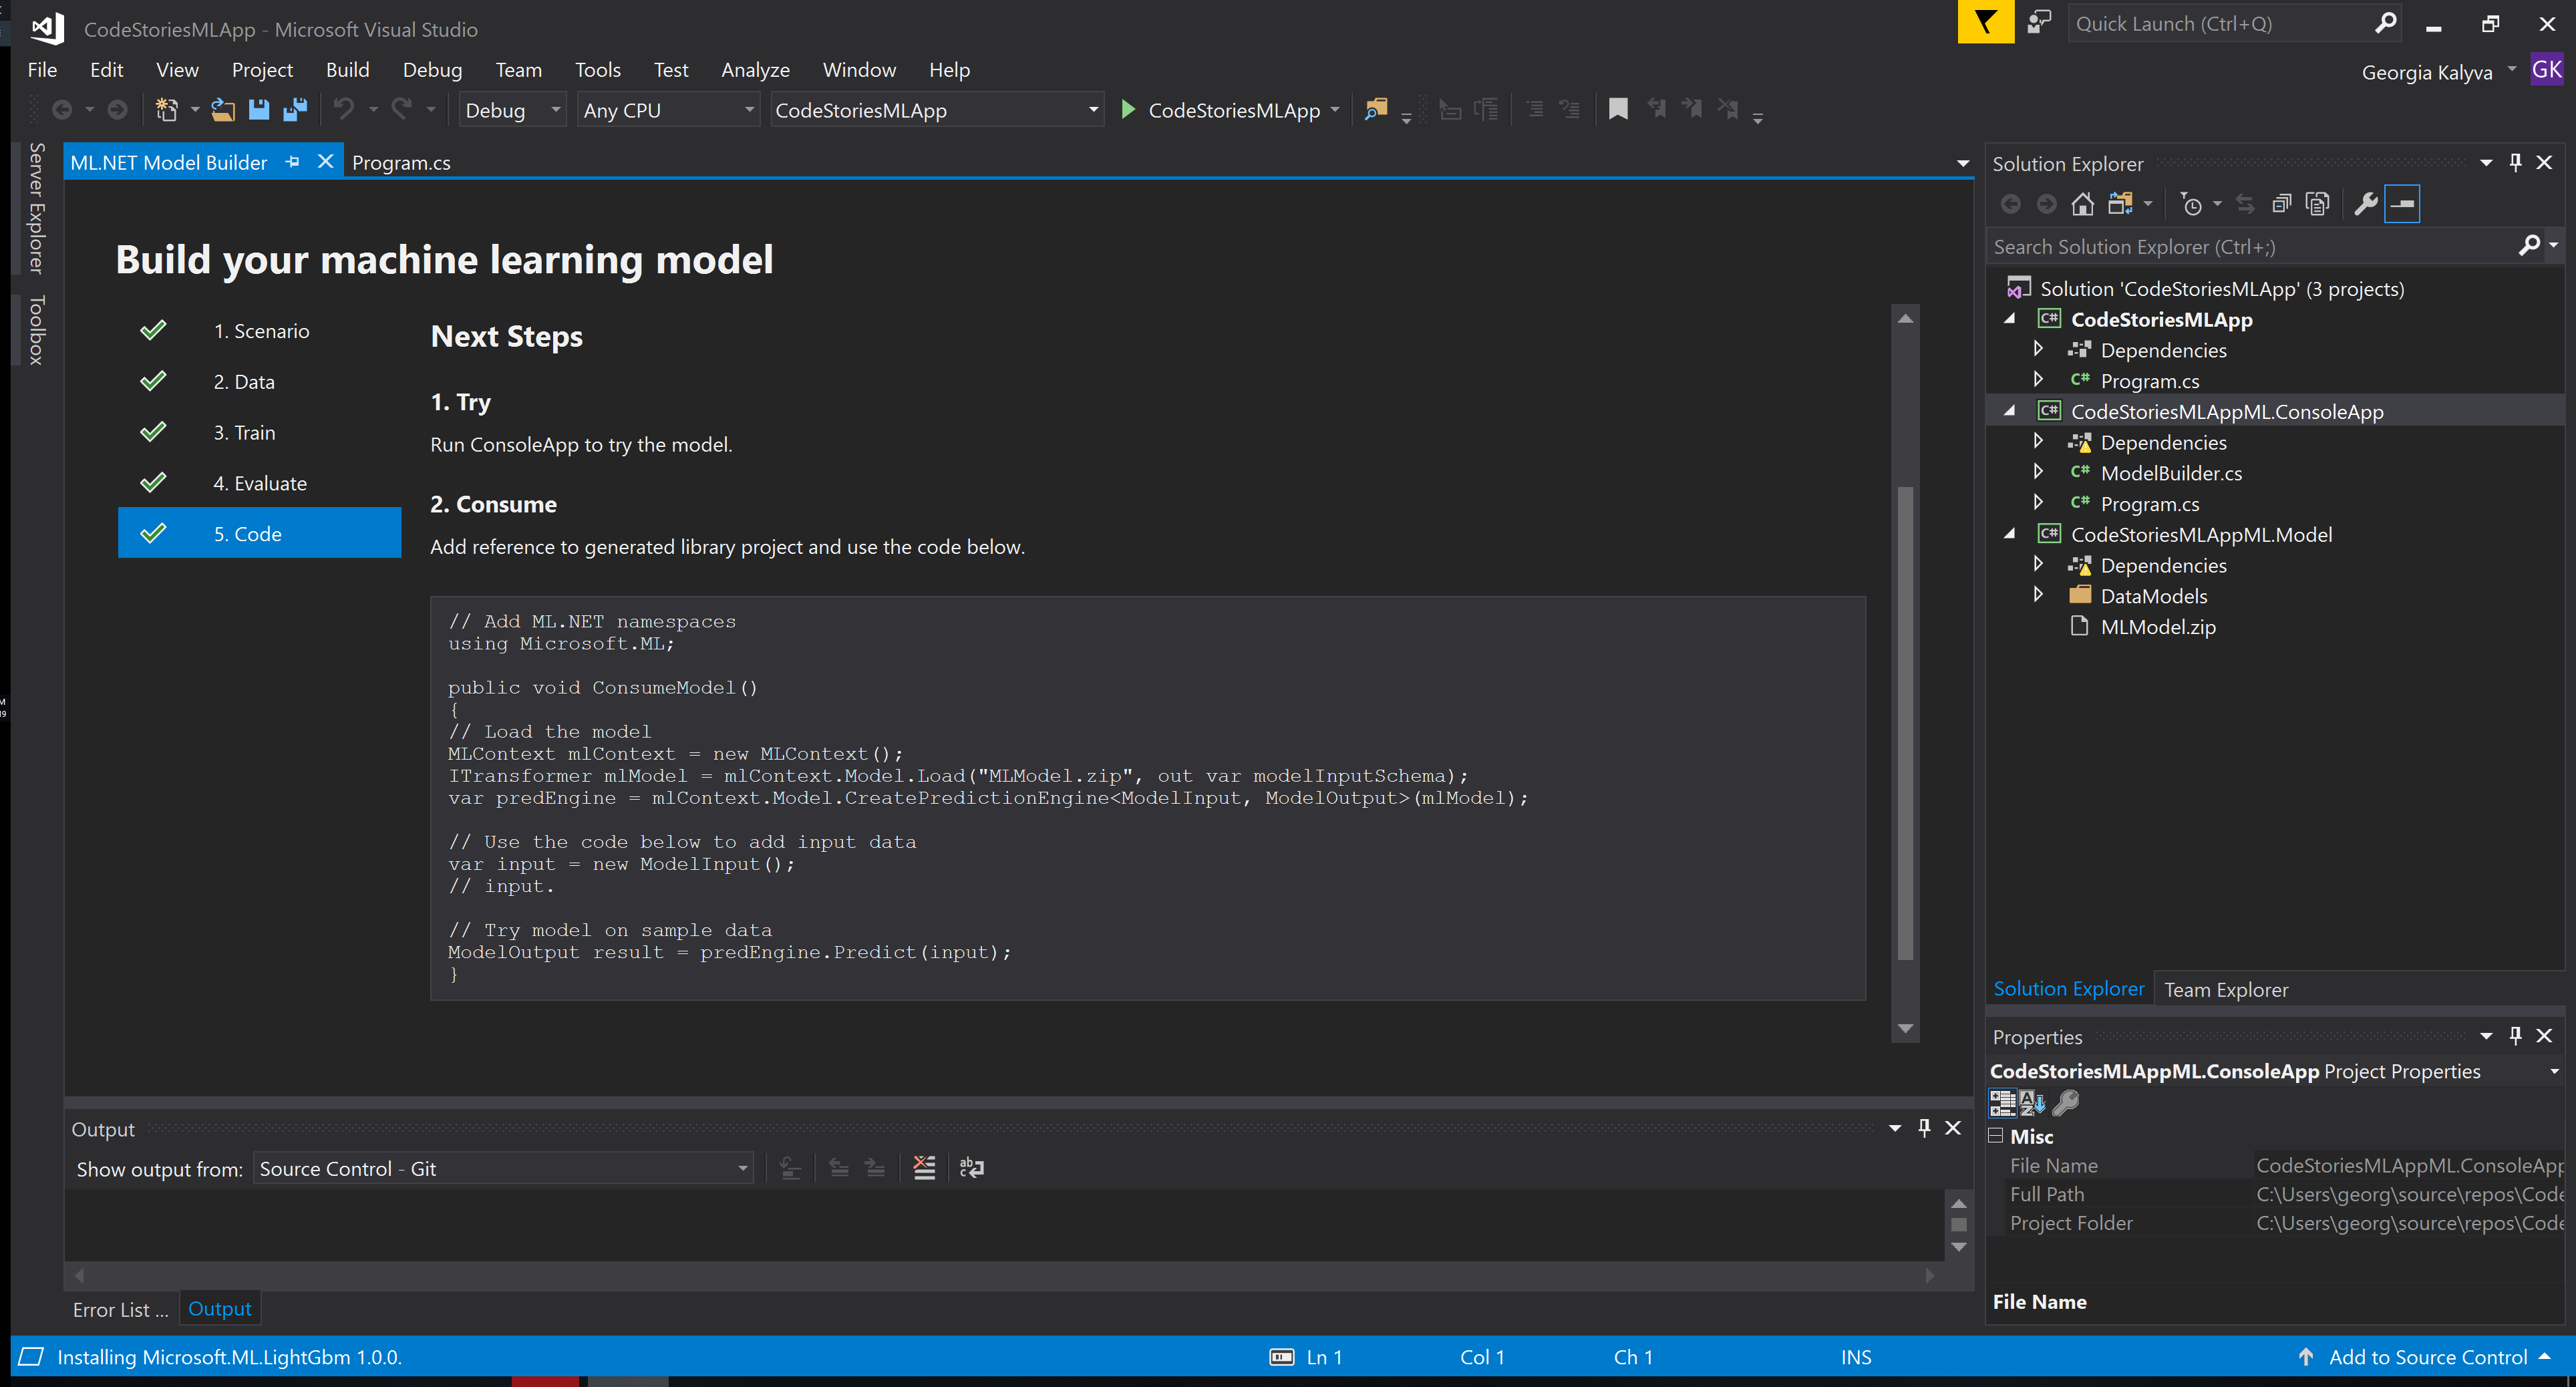
CodeStoriesAppML.ConsoleApp is a .NET console app which contains ModelBuilder.cs (used to build/train the model) and Program.cs (used to run the model).
CodeStoriesAppML.Model is a .NET Standard class library which contains ModelInput.cs and ModelOutput.cs (input/output classes for model training and consumption) and MLModel.zip (generated serialized ML model).
To try the model, you can run the console app (myMLAppML.ConsoleApp) to predict the sentiment of phrases. You can use the model in the MLModel.zip in other applications in similar manner.
Thats it! We have build and trained our Sentiment predictive model using ML.Net. You can find the complete source code in my repository on GitHub.