

In this tutorial we are going to build a simple Coffee House Azure Machine Learning Recommendation Service using Azure Machine Learning Studio. The following tutorial was presented as a workshop I hosted for Hour of Code in December 2018 entitled Create a Coffee House Recommendation Service in 60 minutes. If you are not familiar with Azure Machine Learning Studio read the Getting Started with Azure Machine Learning Studio tutorial to learn a little bit about machine learning and how to use the Azure Machine Studio Service.
What is the Train Matchbox Recommender
We are going to use the Train Matchbox Recommender. The Train Matchbox Recommender module reads a dataset of user-item-rating triples and, optionally, some user and item features. It returns a trained Matchbox recommender. You can then use the trained model to generate recommendations, find related users, or find related items, by using the Score Matchbox Recommender module.
The main aim of a recommendation system is to recommend one or more items to users of the system. Examples of an item could be a movie, restaurant, book, or song. A user could be a person, group of persons, or other entity with item preferences.
There are two principal approaches to recommender systems.
- The first is the content-based approach, which makes use of features for both users and items. Users may be described by properties such as age and gender, and items may be described by properties such as author and manufacturer. Typical examples of content-based recommendation systems can be found on social matchmaking sites.
- The second approach is collaborative filtering, which uses only identifiers of the users and the items and obtains implicit information about these entities from a (sparse) matrix of ratings given by the users to the items. We can learn about a user from the items they have rated and from other users who have rated the same items.
The Matchbox recommender combines these approaches, using collaborative filtering with a content-based approach. It is therefore considered a hybrid recommender.
How this works: When a user is relatively new to the system, predictions are improved by making use of the feature information about the user, thus addressing the well-known “cold-start” problem. However, once you have collected a sufficient number of ratings from a particular user, it is possible to make fully personalized predictions for them based on their specific ratings rather than on their features alone. Hence, there is a smooth transition from content-based recommendations to recommendations based on collaborative filtering. Even if user or item features are not available, Matchbox will still work in its collaborative filtering mode.
Download the datasets
We are going to use some sample datasets I created for the recommendation service. Download the datasets from here and save them to your computer.
Upload the datasets
Open and login to the Azure machine Learning Portal. Go to the datasets section and upload the 3 .csv files. In the New popup window choose Generic CSV file with a header (.csv) to upload.
Required dataset of user-item-ratings: Coffee-House-ratings.csv
It is very important that the input data used for training contain the right type of data in the correct format:
- The first column must contain user identifiers.
- The second column must contain item identifiers.
- The third column contains the rating for the user-item pair. Rating values must be either numeric or categorical.
During training, the rating values cannot all be the same. Moreover, if numeric, the difference between the minimum and the maximum rating values must be less than 100, and ideally not greater than 20.
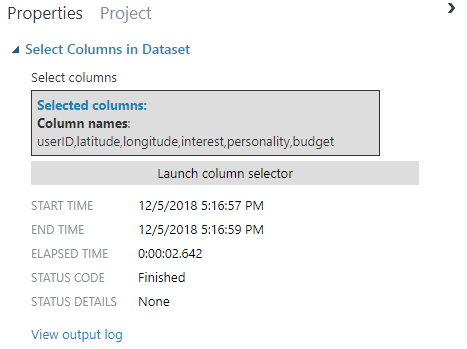
User features dataset: Coffee-House-Customer-data.csv
The dataset of user features must contain identifiers for users, and use the same identifiers that were provided in the first column of the users-items-ratings dataset. The remaining columns can contain any number of features that describe the users.
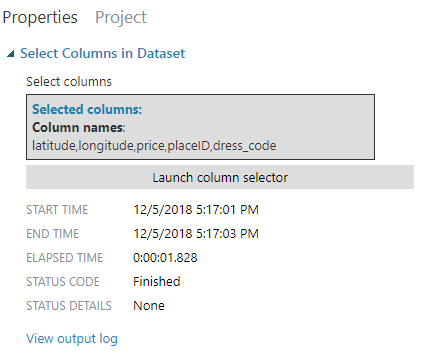
Item features dataset: Coffee-House-Feature-data.csv
The dataset of item features must contain item identifiers in its first column. The remaining columns can contain any number of descriptive features for the items.
Create a new experiment
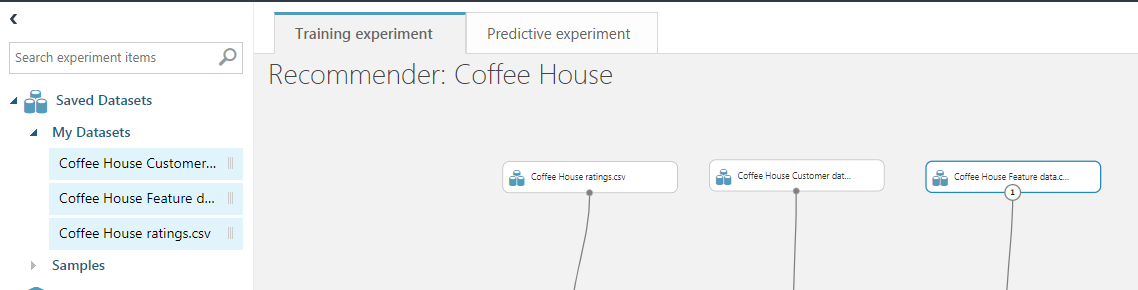
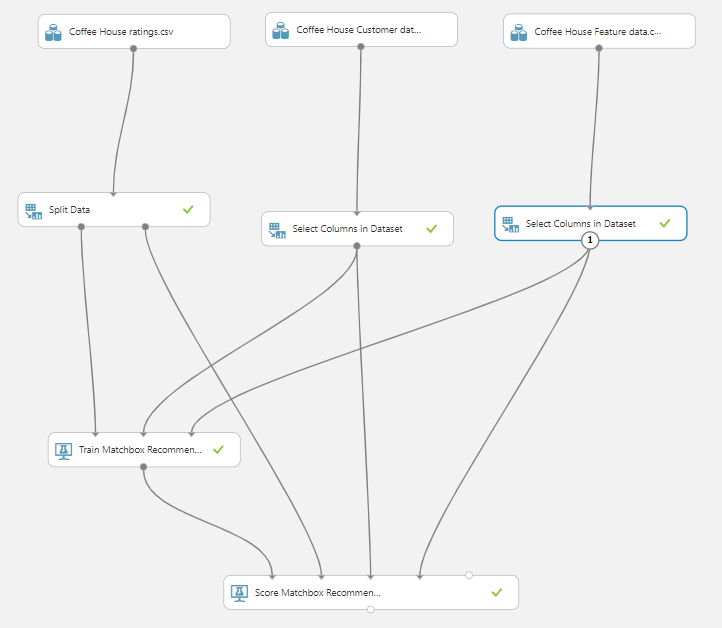
Go to the experiment section and create a new blank experiment. Open my datasets on the left and add them to the workspace. First the ratings, then the customer data and then the feature data.
Then drag and drop the Split data modules and the Select Dataset modules and position them according to the following image.
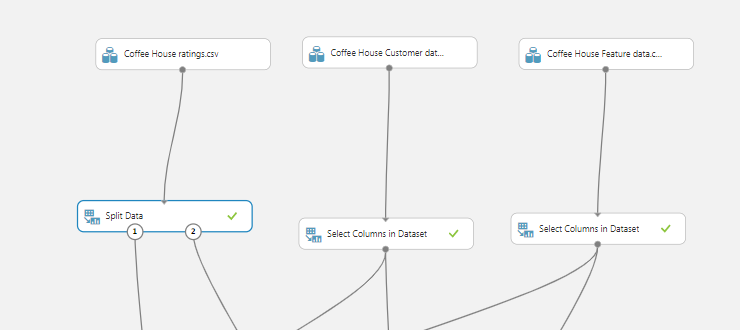
We need to divide source data into training and testing datasets. We use the training dataset to train our recommender module and then we use the testing dataset to test and score the results. To accomplice this we are going to use the Split Data Module. This module is particularly useful when you need to separate data into training and testing sets. You can customize the way that data is divided as well. Some options support randomization of data; others are tailored for a certain data type or model type.
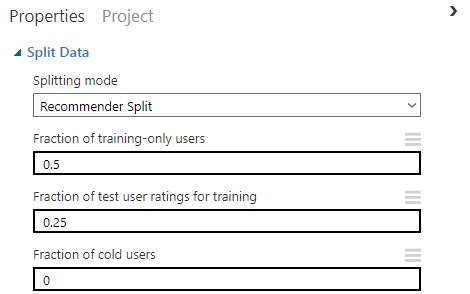
Add the Split Data module and use the Recommender Split option.
Add the Select Columns in Dataset Module to select the proper columns for training.
For the Coffee-house Customer Data Set choose the following columns:
For the Coffee-house Feature Data choose the following columns:
Then proceed to connect all the dataset outputs to the corresponding inputs of the matchbox recommender:
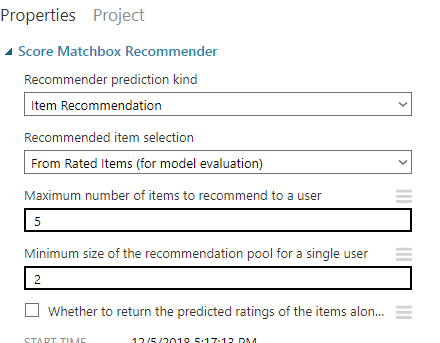
On the Score Matchbox recommender choose the following options:
View and Evaluate Results
For the bottom ribbon choose SAVE to save your experiment and RUN to run it. If all modules have a tick next to them that means that this step has executed successfully. Otherwise Azure ML Studio will show you the error and a link to its explanation and troubleshooting steps.

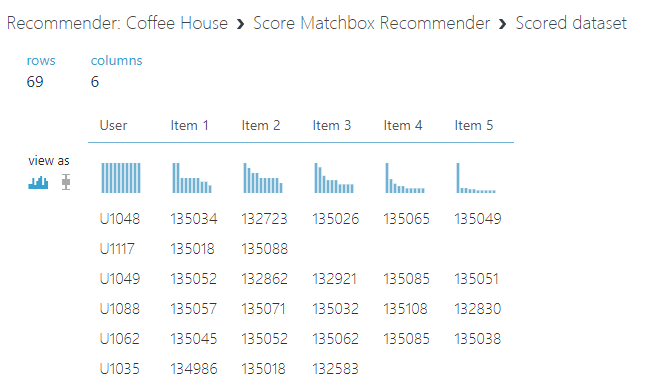
After the experiment has run successfully right click on the Score Matchbox recommender and then Score Dataset > Visualize to review the results.

Here we can see the User ID and the Coffee-house Id the machine learning model has suggested for each user.
Once you are happy with your model the next step is to publish it as a web service. If you want to see how to create a predictive experiment and publish it as a Web Service in the following article: Publish your Azure ML Predictive Experiment.